

 153
153
A Microsoft 365 Group allows you to set up a group of people and resources including an Outlook Inbox and Shared Calendar. As an Owner of the Group, you can add members, remove members and set additional Owners. You can create the Microsoft 365 Group in Outlook.
Creating a Microsoft 365 Group
From the Home tab in Outlook, select New Group from the Groups section of the Ribbon.
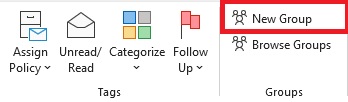
You can find this option more easily with the Classic Ribbon rather than the Simplified Ribbon.
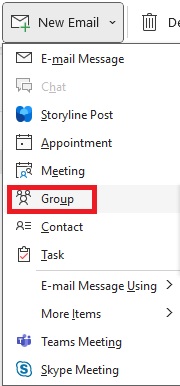
Note: If you are using the Simplified Ribbon, click the arrow next to "New Email" and select Group.
Detailed steps can be found in this Microsoft Article:
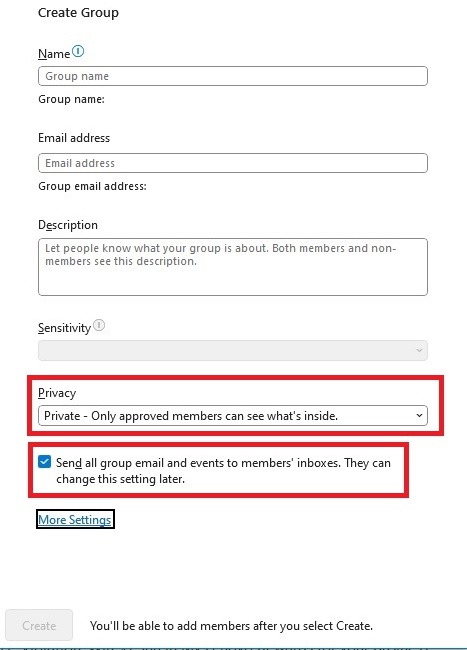
- You can create a Public or Private Group:
- Public: Anyone in the organization can see content in a Public Group and anyone can join.
- Private: Content in a private group can only be seen by the members of the group and people who want to join a private group have to be approved by a group owner.
- You can select to "Send all group conversations and events to members' inboxes." This allows members to see all group conversations and events in their inbox without having to visit the Group directly.
Editing the Group
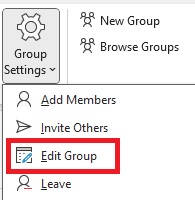
Once the Group is created, you can add members and adjust settings.
In Outlook, look for the Groups section on the left and make sure it is expanded. Click on your Group once you have located it. From here you can go to the Group settings and click Add Members. You can also click on Group Settings and select Edit Group.
From here you can do the following:
- Add Members.
- Delete Members.
- Make a Member an Owner.
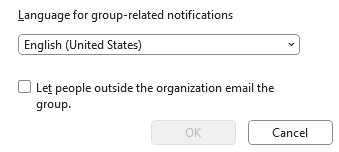
- Select the Language for Notifications.
- Let people outside the organization email the Group.
Calendar
Once the Group has been created, there will also be a shared Group Calendar. In the Calendar section of Outlook, you can go to All Group Calendars. From here you can find the Group Calendar for your new Microsoft 365 Group.
Scheduling A Group Calendar Event
- In Outlook, open the Calendar.
- Expand All Group Calendars and select your group.
- Click on the appropriate date in the Group Calendar.
- Select Home > New Appointment.
- Fill out the details of your Event, including name, place, start and end dates, and, if desired, a personal note.
- Next to Show As, select the Status of your choice.
- Next to Reminder, select None.
- Select the All day event check box as appropriate.
- Select Save and Close. If you've included group members on the invitation, you'll select Send instead.
Note: You can also edit Microsoft 365 Group membership from here:

